
Every once in a while I get a wild hair to make wands. The last time I tried involved yarn, hot glue guns, nail polish, and spray paint. It was strange. The end result is okay-ish enough I suppose but this time I decided to try something different.
Just like before I started with a wooden core, though instead of a dowel rod, I used a stick that I carved off all the bark from. (courtesy of the backyard and my brother’s boy scout knife)

For the first wand I was inspired by hermione’s vines. Grabbing out my clay I rolled a coil and wrapped it around. . . . it didn’t stick, and I burned it in the oven. So I added a think layer of glue down the entire vine to secure it on and fill the gap between the two objects.

Now, polymer clay and wood take stains and paints very differently. Setting my head down on the desk to cry, I pulled out some acrylic paint and slapped it on. tooth brushes, paintbrushes, foam brushes, and scraps of fabric later; it doesn’t look quite so flat. I painted some varnish on top to keep it from coming off all over the place.


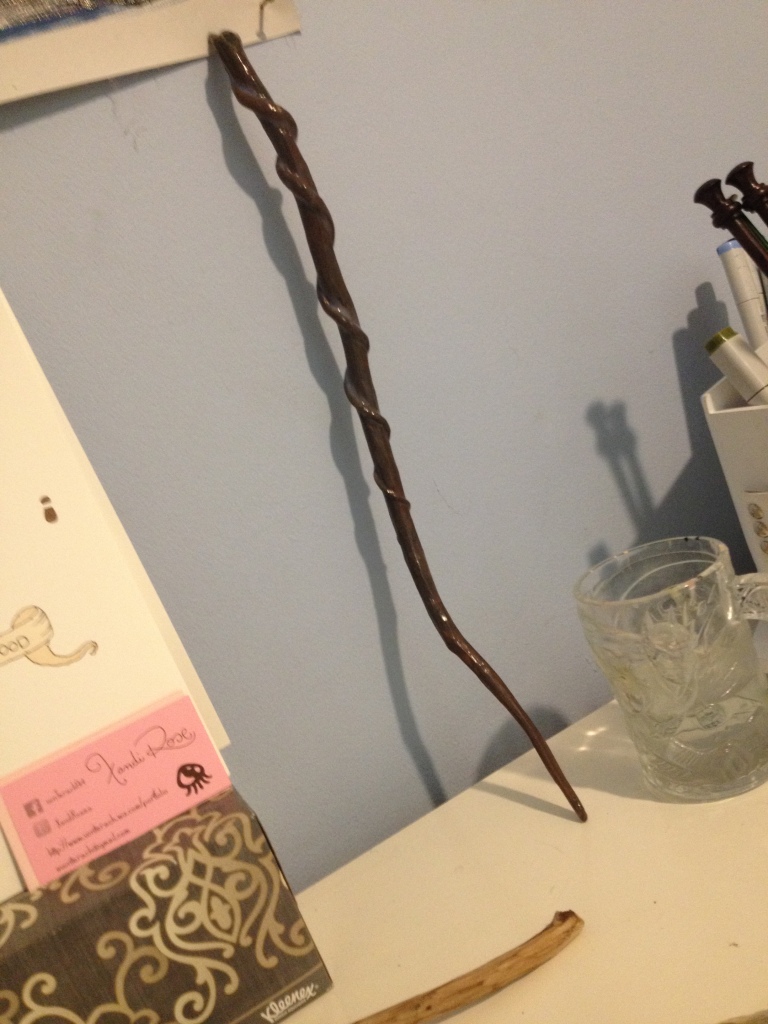
Now this morning I go to check on it after the varnish has dried. Well, the varnish that puddled between the vine and the stick helped to bridge it really well, but it looked really flat. So I mixed up some warmer/lighter brown, brushed it on with a toothbrush, and wiped it off. It helped some. I then sprayed the entire thing with a mattifing spray. It’s kinda a satin-y eggshell now, and you can see my original carving marks much better.


So it still looks a little more rubber-y than I’d like, but I have a whole back yard full of sticks. I’m sure I can find something that’ll take wood stain nicely. Maybe Paper clay?
NOPE! my brain thought “You know what’s easier and readily available? SPACKLE”. So sneaking out into the garage with a beach shovel and an empty macaroni box I borrowed myself some from my father.

Alright, so it actually makes itself into a really nice clay texture. Now spackle, like polymer clay, does not want to stick to–well–a stick, but I do not accept no as an answer.

Basic shapes on! The spackle isn’t really behaving well enough for my patience to do any real detail. I’m pretty sure it’d be easiest to carve into once almost dry. either way, I stabbed it silly while still pretty soft. Bee hives!

So I thought I was going to try staining all of this, but the spackle felt really fragile so I kinda wanted to skip to the part where I seal it and see how strong it remains. On a slapped a base coat of white and some varnish!

So here’s where I’m at now, waiting for varnish to dry. If it’s strong enough I’m going to try gold accents I think. Next wand maybe I’ll go for some paper clay. Also, I’m wondering how well I can make a clay mould from tree bark, so I don’t have to sculpt it. Who knows. After about 10 trial wands I’ll probably decide it’s not working, stash them away dejectedly, only to find them in 6 months and have a great idea.
I can’t decide for display/storage purposes if I want foam cut to shape in boxes of attractive little stands. Next quandary!

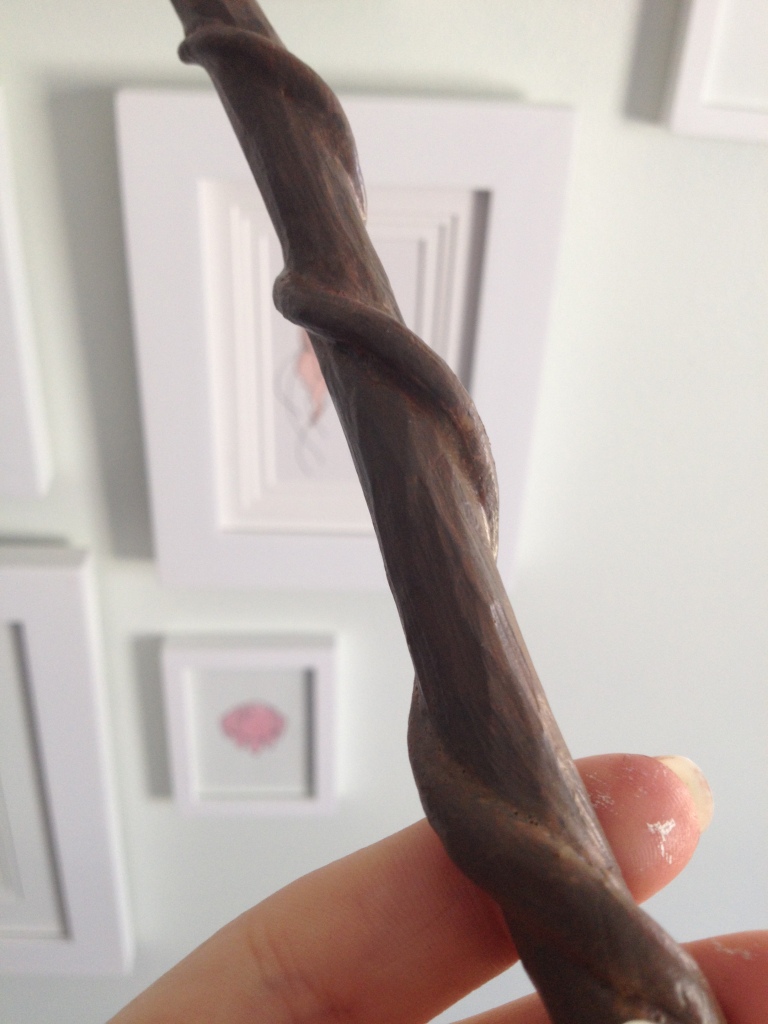
EDIT: So I pulled out my drawer full of half matted things and snipped loose my first wand from the mat backing that was the wrong colour for it to compare against the two new ones. (white wand still WIP)

It’s hard to tell from this picture, because my phone decided to betray me in the poor night lights, but the texture is MUCH better on the new ones.
If I had a easy roll mold I’d even debate doing it in clay, but well. Tried that tonight. Results pending.


simply genius!
LikeLike
thanks! Here’s hoping forward progress from here!
LikeLike
Personally I really like the shape of the dark one. How did you make it?
LikeLike
that one was actually my first wand so there was a lot of trial and error. I started with the basic “harry potter wand design” you see on the internet. What I ended up doing was using yarn to create a firm base shape and them fleshing it out with hot glue to keep it from moving. Nail polish filled in a lot of the holes and smoothed out the parts of the glue that weren’t cooperating. Black paint over top followed with a brushing of brown furniture wax mixed with partially ground charcoal to darken and fix the plastic-y texture. Matt finish spray to seal everything together and keep charcoal from rubbing off.
LikeLike